Integrating Microsoft forms with SharePoint List, using Power Automate (Including File uploads)

This article describes how easily you can integrate between MS Forms and SharePoint Lists, using Power Automate, with no need to write a single line of code.
Requirement: We need to create an MS Form, that records the Feedback of a yearly summit. Here we also need to collect the boarding passes of the participants in the form. We have a SharePoint List, where we need to record the inputs and also store the Boarding pass file uploaded.
The fields:
We have designed the following MS Form, with the following fields:


Please select your grade:

Asking about ambiance:

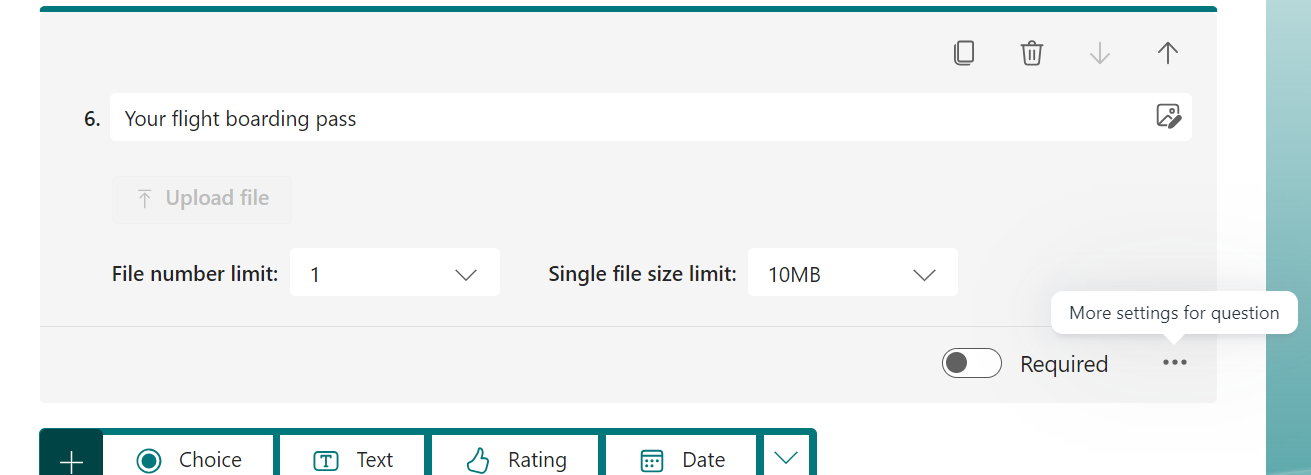
And lastly, let us also capture the boarding pass for the participant:

For ease of our presentation, let us restrict the number of files to be uploaded to 1:
In Sharepoint Online, let us quickly create a list 'On Boarding Feedback':

The power automate design:


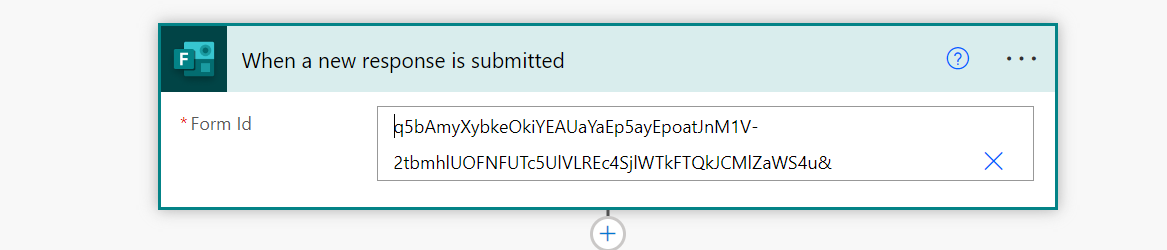
Copy and paste this URL in the Form ID:
You can get the response details as in a loop like this:

And then you can create the record the entered values in the form like this:

[Note the Site Address. Here you can provide the Site address as a URL from your site list created, by choosing 'Enter custom value'.]
Till here, when the user chooses to 'Submit' response, everything gets stored as a record in the SharePoint List, except the attachment. That part is tricky -- watch out the following steps, carefully😀😀😀
We have to add a 'Parse JSON' step here, so as to capture the file name, obtained from the above step. By default, when you upload a file in MS forms, it gets saved as under: \\App\\Microsoft Forms\\<Name of your Form>\\Question 1\\<File name>
To get this, we need to parse the JSON that is obtained from the above step, that comes from the above step, when view the outcome of the 'Get Response details' --> copy the entire content of the JSON;

Create a new step: Parse JSON and get the content of the above JSON like this:

Paste the content of the above obtained JSON in 'Generate from Sample' window.
Now, as described above, add 'Get file content using path' and paste the content like this:

Use the below expression to get the file name:
first(body('Parse_JSON'))?['name'] --> which means, if there are a number of files uploaded, you are considering the first of the element, from the JSON payload.
The rest part is simple. You can directly choose the 'add attachment' action and use the variables from the above step like this:

I am using a loop, just so as to generalize more number of attachments.
Here, choose the site address as described above.
List name: the SharePoint list you created.
ID: This is the SharePoint row that you created from the 'Create Item' step.
Cool, eh?


Can you please tell me the resource and roadmap to learn power automate from scratch
ReplyDelete