An example of step by step ETL on large files in Azure Synapse workspace pipelines
You must have heard the term Batch Data pipeline and 'ETL' interchangeably. But that's alway s not true:
A Data pipeline is an automated process which enables moving data from one system to another. This data might or might not be transformed, and it maybe processed synchronously, instead of assynch batch execution or could be both.
ETL is extraction, Transform and Load which extracts data from one source system, transforms and then loads to another target system (a database/ data warehuse).
This write up is going to show you how to preform cleaning, transformation of data from a source system and save it to a target Database, step by step.
We can start by creating a Azure Synapse Analtics Workspace:
https://learn.microsoft.com/en-us/azure/synapse-analytics/get-started-create-workspace
A point to ponder: Please don't forget to check the entry under:

While going through the above tutorial link.
I created my own workspace and named it as neos-workspace:
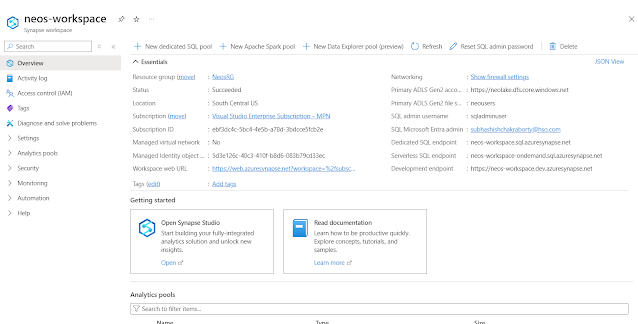
Once done, click on open from 'Open Synapse studio' to continue:

This will open in Web.AzureSynapse.Net portal as:

Click on Data icon from left panel, and hover on to 'Linked' tab to check the connected storagesm and the databases with them. For our demo, we created a storage called: neos-workspace and a file system under that called: neousers:

We would be creating databases under them.
Let us create a folder under the above file system; let us name it as 'D365FOData'.

This will result in the following folder, after this:

https://github.com/subhad365/Dynamics
You can download this file and upload this as under the above location.
Click on Manage >> Apache Spark Pools tab >> Click on + New. Fill out the form as given below:

You need to click on Create to complete the creation, post which it will start showing as follows:

Come back to Manage >> SQL Pool >> Click on +New to create a Dedicated SQL Pool. Fill out the form as follows:

Next we will create a notebook, by clicking on Develop tab and selecting 'New notebook':

Whereby we will be creating a Jupiter Notebook. Jupiter is compatible with Pyspark, and we can beautifully couple up complex transform mechanism with very minimal code coverage. Create the notebook with the following properties:

You now need to go to the Github link given above and copy paste the code in the Notepad code window.
The code looks like as follows:
from pyspark.sql import SparkSession
from pyspark.sql.types import *
from pyspark.sql.functions import col, year, month, dayofmonth, unix_timestamp, round, when
from datetime import datetime
# Replace your storage location
salesPooldf = spark.read.load('abfss://neousers@neolake.dfs.core.windows.net/D365FO/Demo data.csv', format='csv', header=True)
display(salesPooldf.limit(30))
filter = salesPooldf["Rank"] > 10
salesPooldf = salesPooldf.where(filter)
salesPooldf.printSchema()
salesPooldf = salesPooldf.select( col("Rank"),
col("Name").alias("Gaming Company Name"),
col("Platform").alias("Gaming paltform"),
col("Year").alias("Publish year"),
col("Publisher"),
col("NA_Sales").alias("North American Sales"),
col("EU_Sales").alias("European sales"),
col("Global_Sales").alias("Global sales"),
)
print("Transformed sales data")salesPooldf.printSchema()
## Store the DataFrame as an managed spark Table
spark.sql("CREATE DATABASE IF NOT EXISTS salesdata")
salesPooldf.repartition(4).write.mode("overwrite").saveAsTable("salesdata.salesdemo")
The explanation for the code goes like this:
a. The Import statements are including all the module libraries that you need for this transformation to happen.
b. Next, we are loading the content of the file in a Python dataframe (for more info, on what is a dataframe, please visit: https://www.w3schools.com/python/pandas/pandas_dataframes.asp).
salesPooldf = spark.read.load
To fill in what's inside the brackets, you need to go back to the file which you uploaded in the file system, and click on more and then on properies:

And then you need to copy the content of the ABFSS path:

c. Next you are restricting only first 30rows of the file. Then I am trying to filter only those sales for North Amerrica which is greater than 20 and all the publishing years after 2000. You can add multiple where clause like this in your dataframe.
d. Post this I am printing my dataframe.
e. And then I am transposing all the necessary columns which I need, with proper aliases.
f. Finally I am creating a new database called SALESDATA, and dumping all my data in a table called SALESDEMO
Now, to run the notepas, attach the SQL pool which you created:


Comments
Post a Comment