Wassup guys?!!!
Here comes another step by step walkthrough on setting up and leveraging Azure Custom Vision to load, tag, train and predict images, using awesome capabilities of Azure Custom Vision. Just in case you are not aware of Azure Custom Vision, they help you easily customize your own state-of-the-art computer vision models that fit perfectly with your unique use case. All you need is to bring up a few examples of labeled images, train them and let Custom Vision do the hard work of identifying and predicting if any future image is matching its training set.
The trick is to label or tag your data. More you data you can provide and you keep classing them, and feed them to Azure, more precise would be the prediction.
The following article would give you an idea of how all this could be done.
Pre-requisities:
An active Azure subscription
Visual Studio Community Edition (just in case you want to run the code given along with this example).
Some good collection of similar photos ( I have downloaded as many as 20 odd images of Swami Vivekananda).
Step-1:
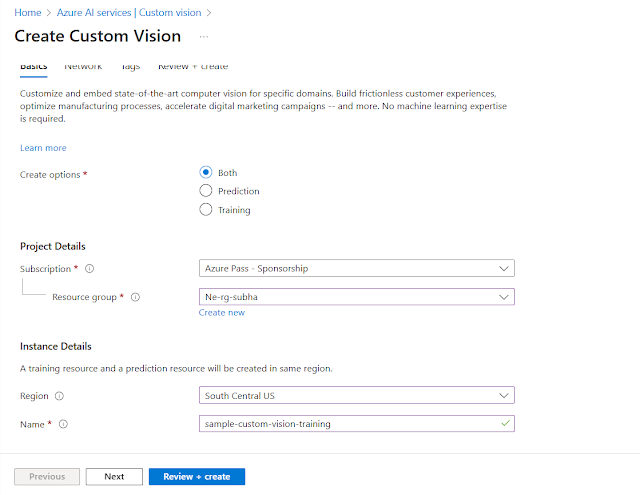
Come over to https://portal.azure.com and create a new Custom vision and fill up the form like this:
Select the type as 'Both', enter/select a resource group, give a proper name to the resource. Select a suitable Region to deploy your resource.
For Pricing tiers, do select a suitable
I have selected Free Tier for Training and for Prediction I didn't have any other choice for my subscription, hence I selected Standard S0.
Click on Review + Create >> Create to finish the creation. This would create two resources: one for training and one for Classification.
Step 2: Log on to "Custom Vision - Projects" and by signing in with the same subscription with which you created the resources. It will take you to the empty podium where you can create your own project:
Click on new project >> and fill up the form that comes up:
Give a suitable name to your project along with a description. Choose the Resource which you created on step-1. Rest all you can keep as it is. We can select multiple tags for an image, but for this demo we are keeping one tag/label for one image. Press Ok to complete the Wizard.
Whew -- you are done in creating your project!
Now you need to upload images to your project:
Click on Add images button: the following screen would pop up, after you have uploaded your image:
Type a 'Tag' and then click on Upload 1 file. I uploaded 10 files under the tag of 'Swamiji' (Swami Vivekananda) and 5 something under the tag of 'Netaji' (Netaji Subhas Chandra Bose -- the George Washington of India); consequently the whole project now would look like this, along with the tags:
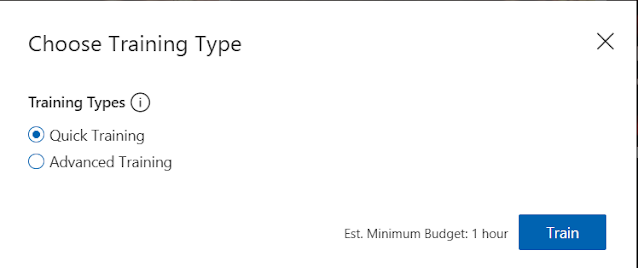
Click on the 'Train' button to start your project train with your data and their labels:
The following screen will popup:
You can select Quick Training for demo purposes. For Advanced training, more than 50+ images would be required for a detailed level analysis.
It will take 12-15 minutes to complete with the training exercise:
You can now Publish the Training by clicking on 'Publish' button. It will ask for the 'Prediction' resource you would like to use. Do remember to create the Prediction and Training resources on the same location (in our case South-central US).
Once published, you would be able to get Prediction URL from the top, which you can use in your code or in middleware tool to leverage (Azure Logic app, Azure functions, etc.)
We can test how close our prediction modeling is accurate by uploading a test image and checking if the system is able to identify the person:
Which is not in my uploaded image set. Click on 'Quick test' to see the result:
You would get the result which looks a lot like:
Which is a good probability, indicating that our model can rightly identify the person. If we keep on adding more images, it will be more precise and exact, obviously. Hence is the need to feed more data and more number of iterations.
Implementing the test using C#:
If you have already installed VS 2022, community edition, you can create a new Console Application and start with a Programm.CS that looks like this:
using System;
using System.IO;
using System.Net.Http;
using System.Net.Http.Headers;
using System.Threading.Tasks;
namespace Subha_ImageRecognition
{
static class Program
{
static void Main(string[] args)
{
Console.WriteLine("Enter Image path");
String filePath = Console.ReadLine();
PredictImageFromClassification(filePath).Wait();
Console.WriteLine("\n\nPress enter to close the program");
Console.ReadLine();
}
}
}
I'm calling a static method called 'PredictImageFromClassification' that can accept a local file path image file and analyse its contents.
static async Task PredictImageFromClassification(String filePath)
{
var client = new HttpClient();
client.DefaultRequestHeaders.Add("Prediction-Key", "<Copy the header element from the step-3>");
string url = "<Copy the URL path from the step-3>";
HttpResponseMessage msg;
byte[] bytes = ImageToByteArray(filePath);
using (var content = new ByteArrayContent(bytes))
{
content.Headers.ContentType = new MediaTypeHeaderValue("application/json");
msg = await client.PostAsync(url, content);
Console.WriteLine(await msg.Content.ReadAsStringAsync());
}
}
It's an asynch call which further makes a call to Custom Vision project API and reading its contents by calling another function 'ImageToByteArray' which looks like this:
private static byte[] ImageToByteArray(String filePath)
{
FileStream reader = new FileStream(filePath, FileMode.Open, FileAccess.Read);
BinaryReader rd = new BinaryReader(reader);
return rd.ReadBytes((int)reader.Length);
}
Build your project now. Start the project >> Give the file path and the name of the file in the the following screen that comes:
Which matches exactly with the the result which we tested earlier.
Amazing!!! Ain't it? So much for today, will come back with more of such Azure AI components soon, on another post.
Much love and Namaaste, as always💓💓💓


Comments
Post a Comment