Step by step: Azure ML Job to predict using Azure endpoints (No coding needed)

So buckle your seatbelt Dorothy, 'cause Kansas is saying bye-bye.
In our example, I would be training Azure ML studio with heavy dataset of apartment prices at Mumbai, using Regression Algorithms. Once ready, we would be choosing the correct model to create an endpoint, that could be used to predict the price of any apartment, for any combination of area, location and room details. Uh, oh -- before we begin, I would request you to read by previous post: https://subsd365.blogspot.com/2024/08/train-your-data-model-using-azure-ai.html
This could give you a basic understanding of what is Regression algo is all about. We need regression here, becuase we are gonna predict numbers. If would have needed to predict something in yes-no, true or false: then we would have gone for Classification algo. If we needed to check for values based on time based predictibility, we should consider using time-series forecasting algo. Hence it all depends, the type of algo you need, the work that you would like to do.
Step 1: Let us begin by creating a Azure ML resource: this I have already covered in the above link. So nonce you get into the Azure ML studio, you can hover all the way down to Assets >> Data >> And click on create to create the data, which you would like to analyse.

Fill out the following as a first step. Click on Next to continue.
Select 'From Web files' in the next step to continue:

In the next step, fill out the URL from the below site to continue:
https://raw.githubusercontent.com/Mega-Barrel/Bombay_Rent_House_Analysis/master/data_sets/cleaned_data.csv

It's essentially a very large data site, containing several instances of apartments, their types, their rents and agent/constructors' names. Click on Next. It will validate the data for a couple of moments, before taking you the the next page:

This contains the synopsis of the data supplied, in a tabular form, showing you the first 50 odd records of the total records. Click on Next to continue.
This screen will show you the schema of the data entered:

And finally the following screen will show up ton indicate the data supplied:

Click on 'Create' to finish the wizard. If everything is alright, this would create the data as shown in the below list:

Step 2: Now that your data is ready, let us jump to create an Azure automated ML job, that can be used to train the model with the data.

Click on the Icon to start.

In the next step you select the dataset which you created from the above step:

Select 'Regression' as Task type. Click on Next to continue.

Additonally you can click on 'View additonal configuration settings' >> Click on Blocked Models, to restirct what all the models you don't want to run your data on:

This depends from project-to-project. There are some obvious models which are irrelevant on certain machine training models, and we can safely block them: consequently they can save a good amount of money.


Click on Next:


Step-3: Once done, you can click on Jobs >> click on the job which you created:

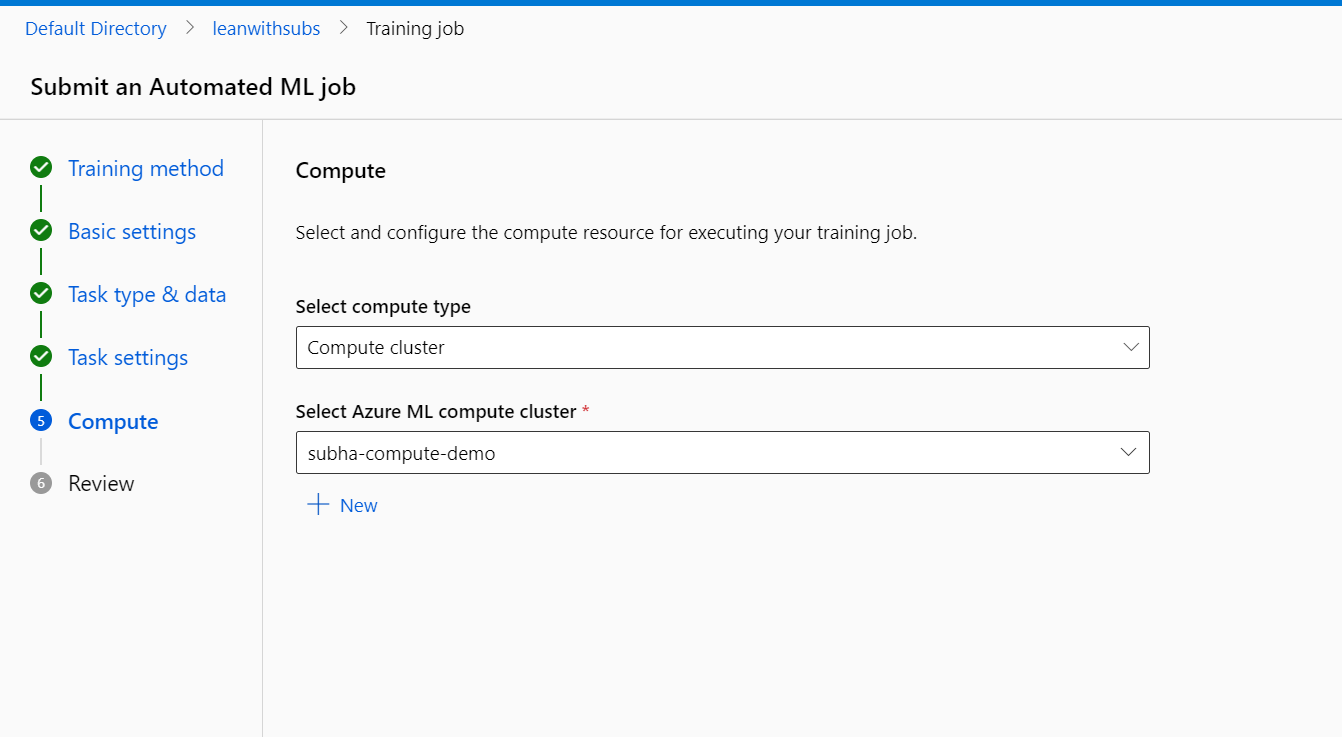
Click on Model + child jobs >> it will show you a list of all the jobs (parallel threads) of 'epoch's which the training model has gone through, suggetsing which model has taken what precision (Normalized root mean square error). More close to one, more is the precision. Select the best one which you think, click on Deploy >> Real time deploy>>

In the following screem select as following and click on Deploy.

It will take several moments to make the endpoint ready. It might get errors like: HttpResponseError: (SubscriptionNotRegistered) Resource provider [N/A] isn't registered with Subscription [N/A]..
To fix the same go to your subscriptions:

Go to Resource providers:


You can see the Endpoint which got created:
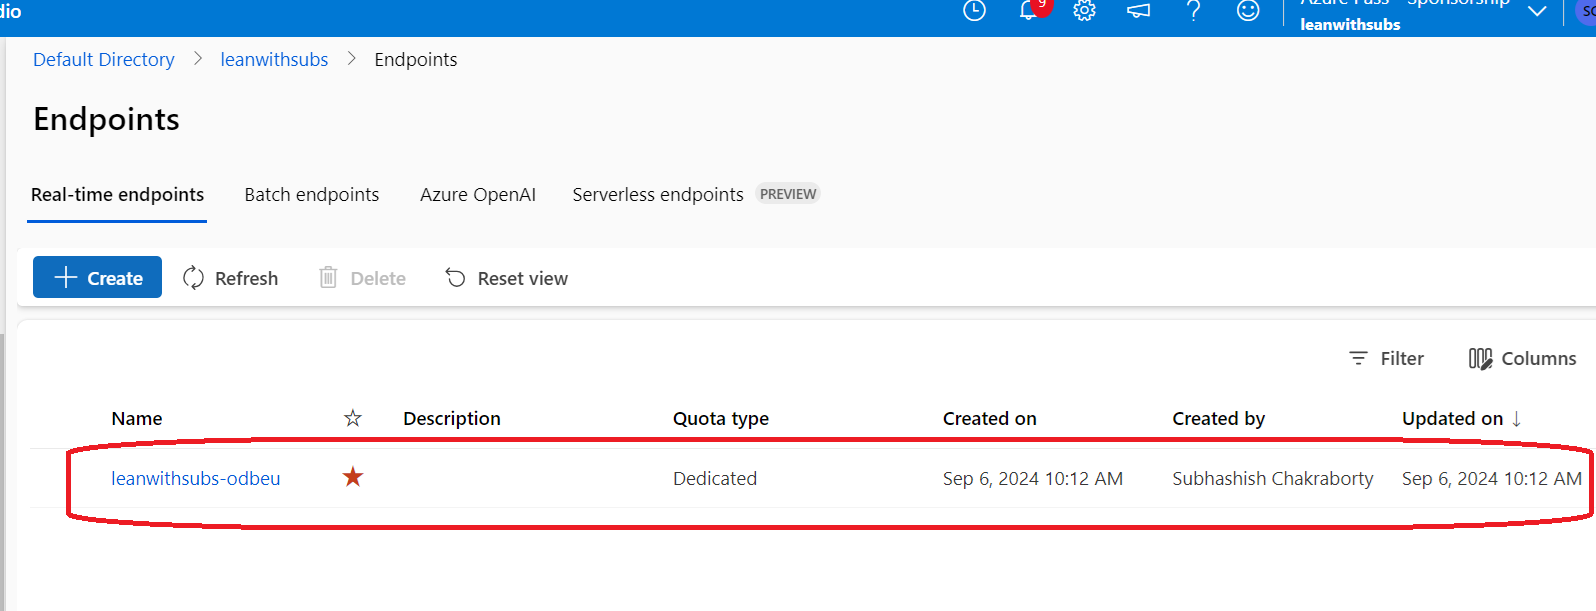
Click on it, and you could see the details, with the status as Succeess:

Click on Test to test the Endpoint.
I tried with the following data (note the format of the data):
{
"input_data": {
"columns": [
"area",
"bathroom_num",
"bedroom_num",
"dev_name",
"furnishing",
"locality",
"post_date",
"type",
"user_type",
"year_posted",
"month_posted"
],
"index": [1],
"data": [
[1000, 1,1,"Veena Group","Semi-Furnished", "Vasai", "2020-01-11", "Multistorey Apartment", "Agent", "2020", "01"]
]
}
}
Click on 'Test' button:

Which is a near approximate data to what we have feed in.
If you are not satisfied, you need to change the algorithm and try the whole process over and over again.
Whew!!! Isn't that exciting? Am gonna come back soon with many such cool features of Azure AI, on forthoming blogs. Till then take care, much Love and Namaste 💓💓💓


Comments
Post a Comment